Restoring a Nelson Brothers stationary engine
Posted by Chris Graham on 6th June 2024
Merv Cloake charts the exacting restoration of an interesting and rare Nelson Brothers P type stationary engine.
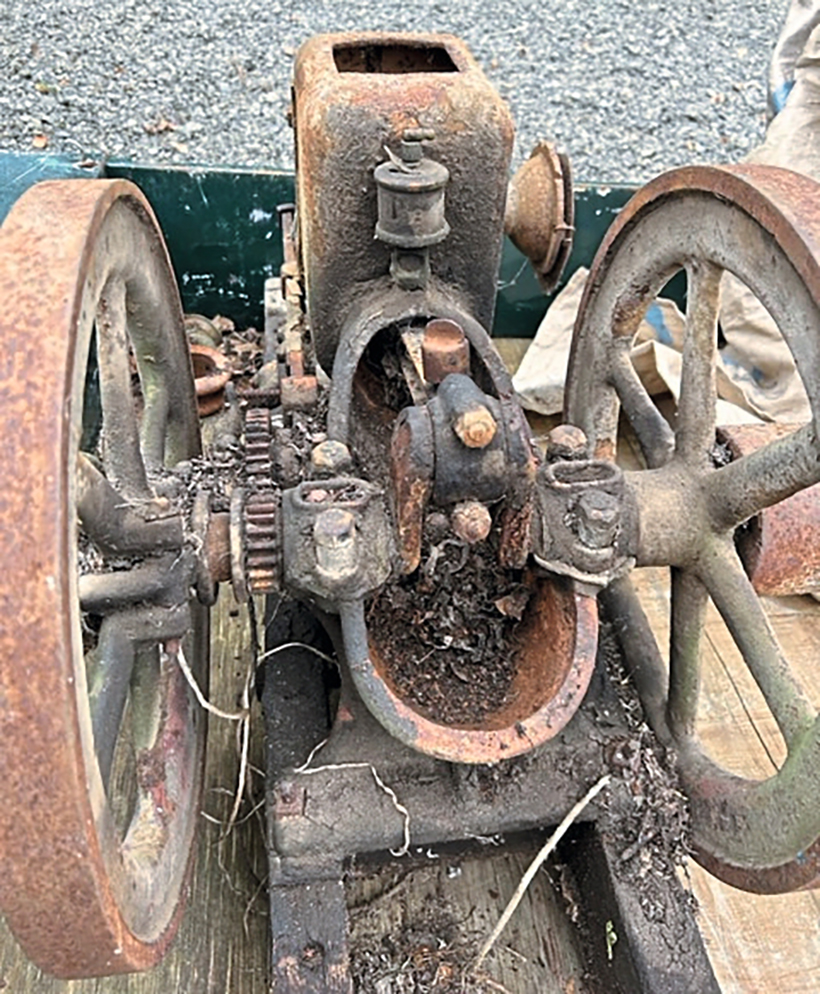
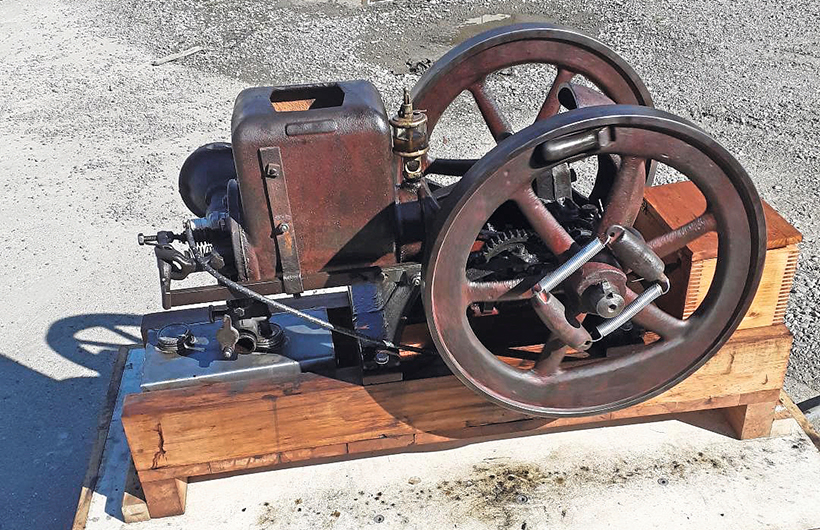
Here we see the Nelson Brothers engine as first acquired.
Back in early 2023 my friend Mike told me about three engines that he had located. The man that had them was not known in the engine world; originally, they belonged to his father and uncle and he had kept them for many years in a shed at his home.
One was a 1 hp Mogul, another was a 3hp International M that I ended up with and the third was an unknown open crank of about 1 ½ hp.. A deal was made; Mike already had a Mogul but he soon restored the Mogul and that turned out to be a really good engine. He did not want the M and he was not all that impressed with the open crank, but because he did not know what it was and it appeared to be “incomplete” [no magneto etc], he paid very little for it, so that engine and the International M type turned up in my yard, as more projects for me when I get time.
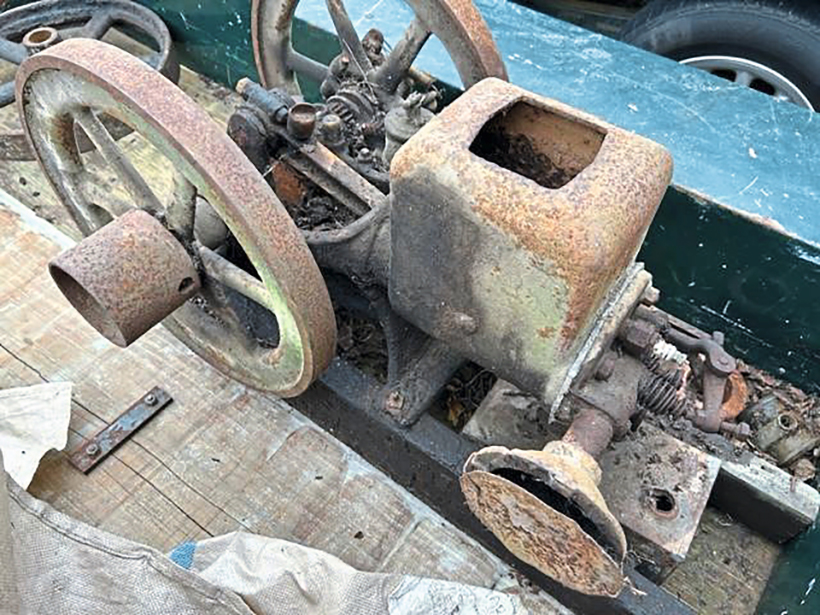
The engine as it arrived in my yard.
Identifying the engine
I soon was able to identify the open crank as a Nelson Brothers and it would have been fired with a battery and buzz coil ignition. I did some research and I believe it is an A type. There appears to be no provision for a name tag but the serial number on the crankshaft is A1236. Nearly all of the small Nelson Brothers engines I have seen have either a LT Webster magneto with an ignitor or a Wico EK type magneto and spark plug. Another difference I found on this engine is that the spark plug is in the top-centre of the head whereas the others are on the side of the head. Other small Nelson Brothers engines I have seen are tagged as ‘Little Jumbo’ and painted green; this one was painted red. I suspect that it was a contract engine and had possibly been on a piece of equipment. There was no known history for it.
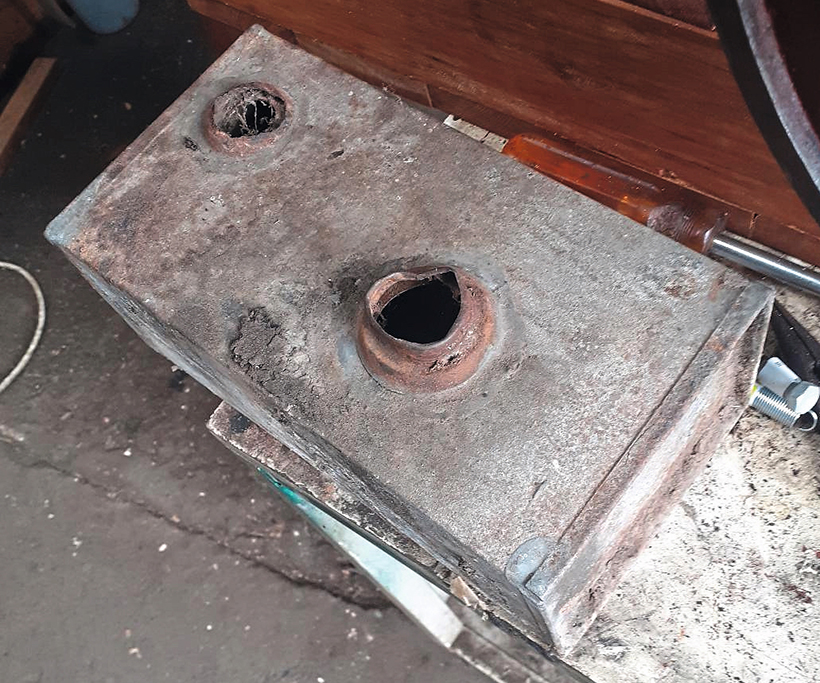
The original fuel tank.
I was not sure what was going to happen to the engine as Mike did not seem to show much interest in it. It was covered with a solid layer of oil, dirt and grime and was seized; it certainly did look like a ‘project’. Mike likes easy projects and it was beginning to look like it was going to be my project.
Restoration begins
One day, when I had some free time, I made a temporary base for the engine and got it on a bench to have a good look at it. The piston was stuck, but on the plus side of things it turned out that the only part missing was the ‘lobster tail’ crank guard; it even had the oiler. The fuel tank had rusted out but it definitely looked ‘do-able’. The seized piston was easily removed and as time permitted I started to remove the accumulated layers of oil and dirt which revealed quite a lot of red paint that was worth protecting. I used a chisel to scrape the dirt off and managed to leave most of the paint. I did not use a degreaser as sometimes it is hard on the paint, so using kerosene I did get it clean; I was happy with the result. The engine did not have any provision for a name tag nor did it have any vestige of a transfer that the Little Jumbos normally have.
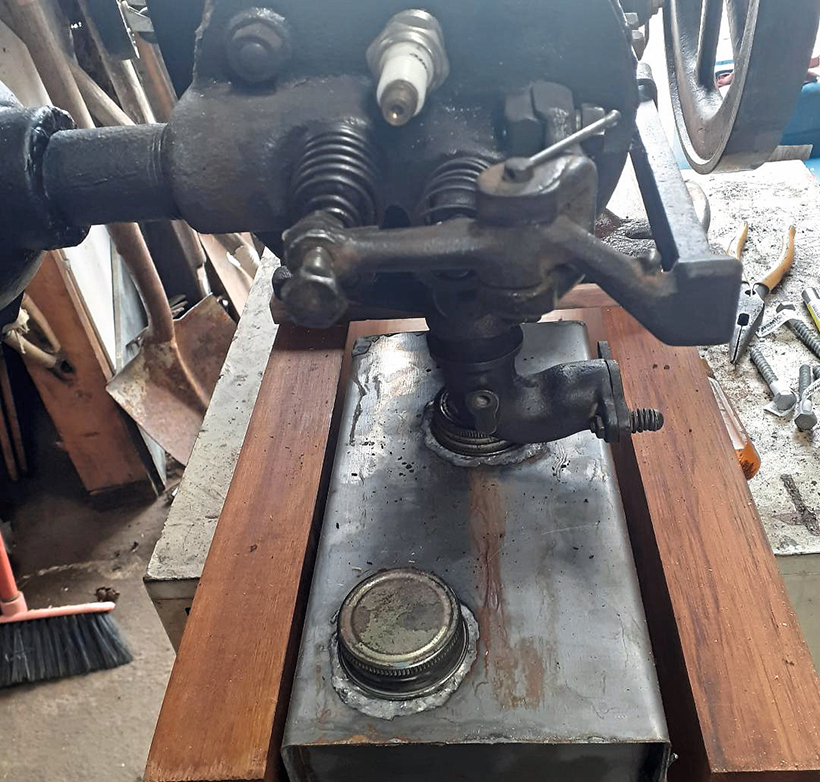
The new fuel tank in position.
As time went on progress was made. All of the bearing surfaces were in great condition as were the bore and rings. The valves only needed to be lapped as they were also in great condition. In fact this engine’s condition would be one of the best I have encountered in all my years of engine restoration. Assembly was straightforward and although the cam had only one lobe, the timing is set up the same as the two-lobed cam. There is a boss on the side of the cam gear that controls the spark timing which is the equivalent of the second lobe. To set the timing, the exhaust is timed first. This was done by taking the throw of the crankshaft and the high point of the cam to the vertical position and adjusting the exhaust valve rocker so the valve begins to opens thirty five to forty degrees before bottom dead centre, and closes just after TDC; then the rather crude spark-timing device is adjusted to spark at about 5 degrees before TDC. If the exhaust valve timing is not correct, the spark-timing cannot be timed correctly.

Cleaning off the old oil and dirt exposed original red paint.
It is important to realise that the slower the engine is set to run, the later the spark timing has to be. This is because the inertia created at low revs can break the engine in half, or break the crankshaft; Nelson Brothers are prone to do that. This is typical of all single-cam engines with the two-lobed cams that controls both the exhaust valve and spark Actually this is the opposite to that which the instructions describe for these single engines; however these engines are not designed to run as slowly as many like to run them at shows. I run most of my engines at about three quarters of their rated speed.
It was shaping up to be a very good engine. I made a new fuel tank to the same pattern as the old one. It is mounted directly under the fuel mixer with the pick-up going through a screw cap into the tank with a check-valve on the bottom. The filler cap is the same as the metal screw caps that we managed to find on old paint thinner cans. They were cut out and soldered in as the tank was made; all straightforward stuff.
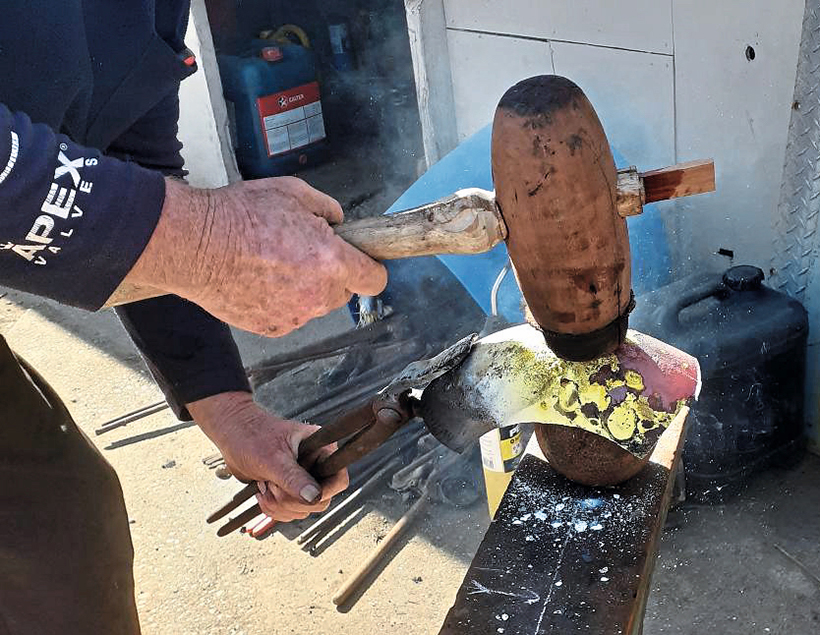
Irwin the Blacksmith making the Lobster Tail crank guard using a wooden hammer.
Creating a crank guard
Mike was starting to take an interest in the engine as he began to realise how good it was. I still had the problem of what to do about a crank guard, and what was to be the best way to go about making a new one. I talked it over with Irwin and we both knew we would be using his blacksmith skills as we have done many times in the past. Actually it was quite easy; I had a three inch 90 degree malleable iron pipe bend. This was marked out and cut to the shape that we needed to finish with. It was heated in the forge and hammered into shape with a wooden hammer over a steel ball on the anvil. Using a wooden hammer on red hot iron may surprise some people but blacksmiths often use a wooden hammer to prevent hammer marks marring their workmanship. Irwin got it to fit perfectly and I managed to create the patina to match the engine. It looks almost like an original cast-iron guard. The engine was then coated with several coats of 50-50 boiled linseed oil and turps, and I must say that it looks great.
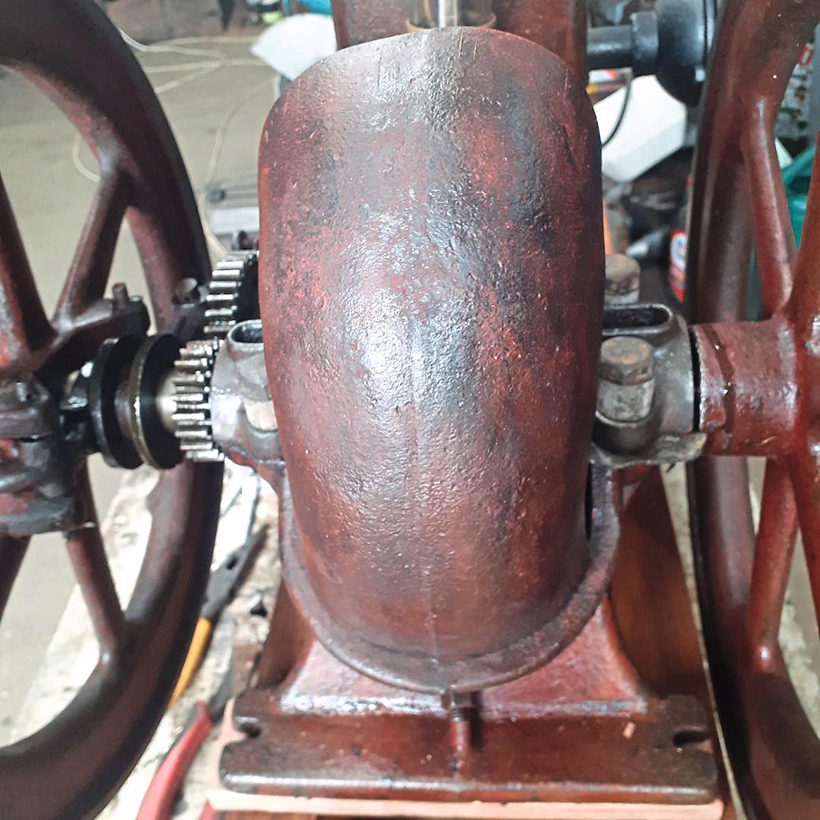
The finished (Lobster tail) crank guard.
Start-up time
Now that I had the engine assembled, complete, and mounted on a base, it was time to see if it would run. The only buzz-box I had was on my Elgin Hafa-Horse engine so this was temporarily wired to a battery and the engine and after a few attempts it fired up. I would like to say that it ran perfectly but it didn’t. It was erratic and it turned out to be the buzz-box failing. The next thing was to wire it to a car coil, this time it ran great. Sometimes buzz-coils can be repaired by fitting an external condenser, if it is the condenser that fails. In this case it was one of its coils. Mike found a good one while I made a finger-jointed box to house the battery and buzz coil.
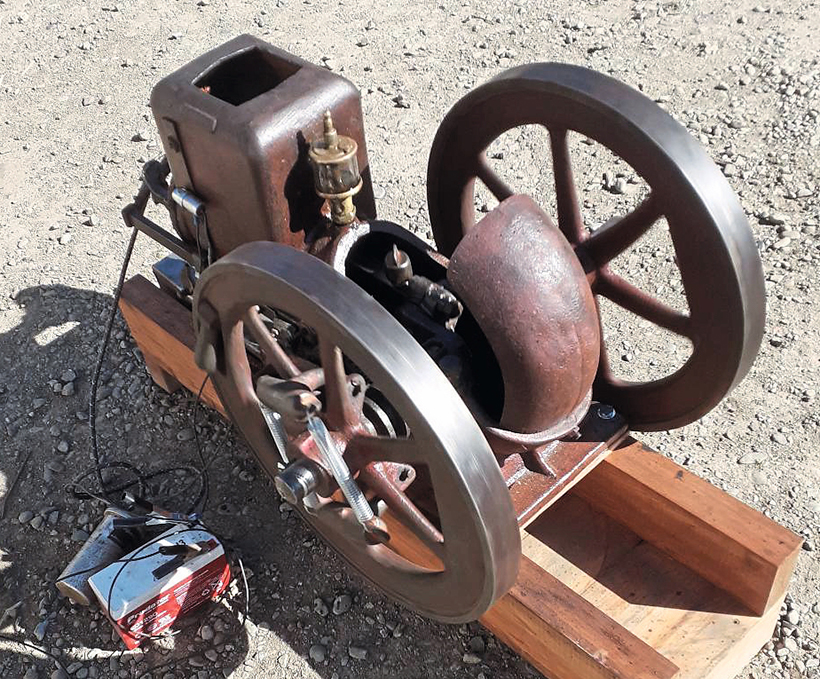
Starting the engine with car coil and battery.
I found that it could be temperamental to start but I managed to overcome this by closing the choke and then open the needle valve half a turn, pulling the flywheel over one turn, then closing the valve, and opening the choke and it will fire on the next compression. From there, it was a matter of adjusting the fuel setting for running. If it is flooded it won’t start. It is a very nice engine and in great condition. There was no major work required, except for the crank guard, and the outer part of the muffler, it has very good compression and I would say that it had done very little work.
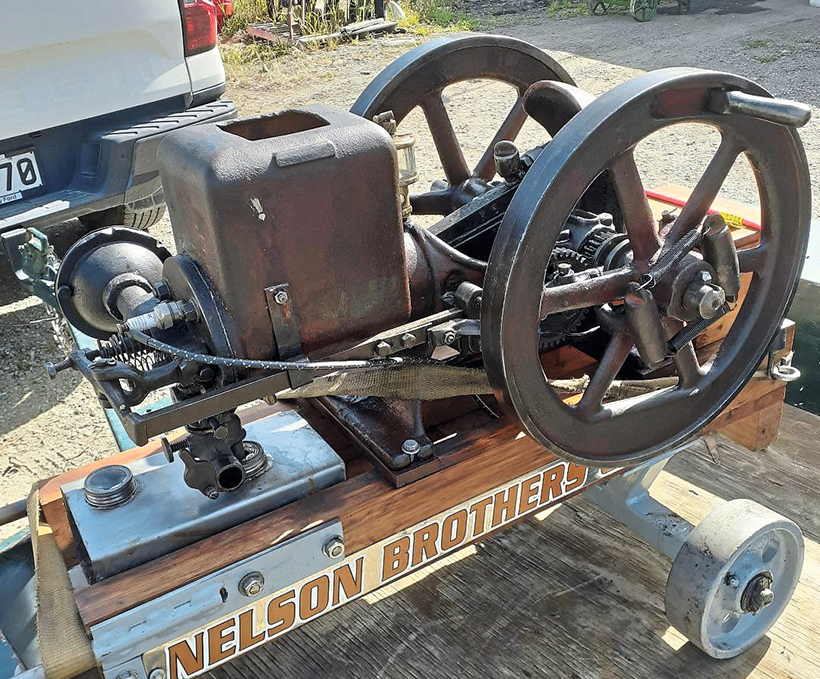
The finished engine just before it was relocated to Mike’s property.
There is an interesting little twist to the story: Mike loves to paint his engines and add a little ‘bling’ as well. He makes them look pretty good too. I have explained to him that looking good doesn’t make them run any better. For this engine he made a set of wheels and a pair of handles. When it was time for him to take the engine away, he mentioned that he would fit the wheels etc and paint the engine….! My immediate response was “If you are going to paint it you are not going to get it back!!!” He didn’t paint it but he did paint the wheels and handles and had a Nelson Brothers decal made to put on the rails. Actually it looks good and it is a great runner.
The engine, now with a buzz-coil ignition.
This feature comes from the latest issue of Stationary Engine, and you can get a money-saving subscription to this magazine simply by clicking HERE

Previous Post
1980s Volvo F7 gets properly restored

Next Post
Collectable Morris Minor LCV van and pick-up models