Piston ring replacement guide
Posted by Chris Graham on 6th March 2020
Sam Bloake provides a helpful and practical, experienced-based piston ring replacement guide
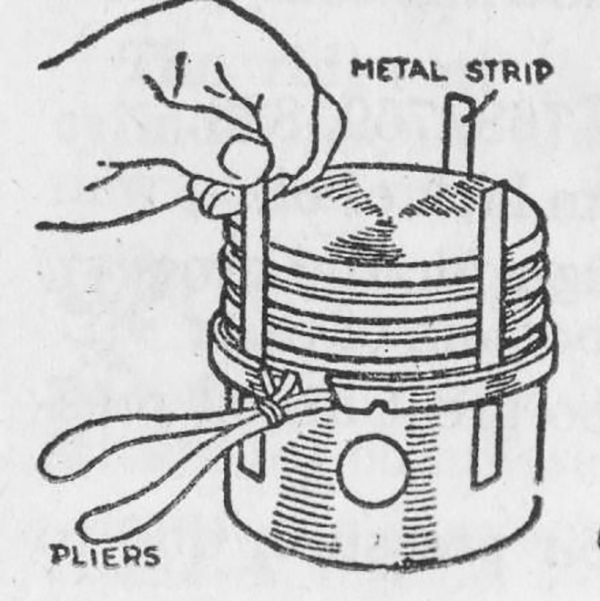
Piston ring replacement guide: Using thin strips of shim can help with getting new rings over the grooves.
At a rally last year, I got chatting with some friends about fitting piston rings in their engines. It was quite interesting hearing their opinions, and the arguments for their actions; it made me realise that, although it’s a subject that’s been discussed many times, there’s still a huge gulf in peoples’ knowledge.
Worn rings are detrimental to an engine’s performance. Compression will obviously be reduced and there will be significant blow-by, that sounds just awful and creates lots of mess. Fuel consumption will increase and power will fall away, and that’s if it’s still good enough for the engine to run. Often, it’ll have got so bad that you simply won’t be able to start it.
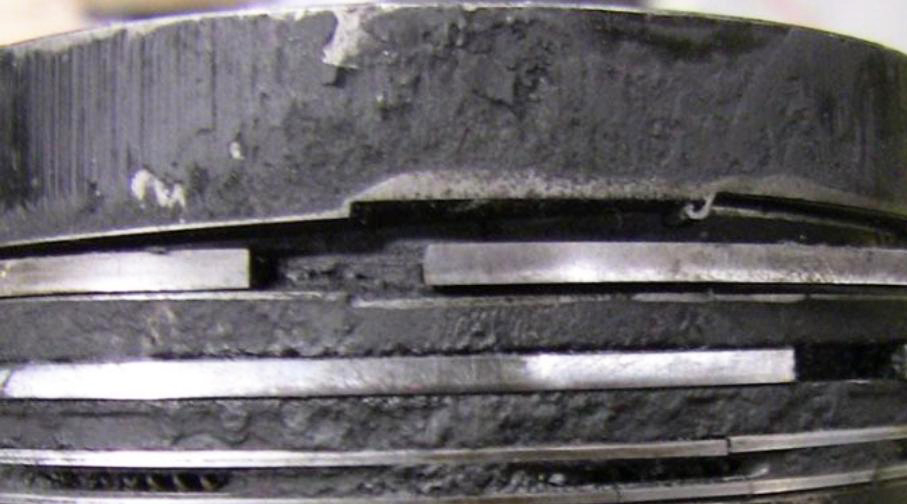
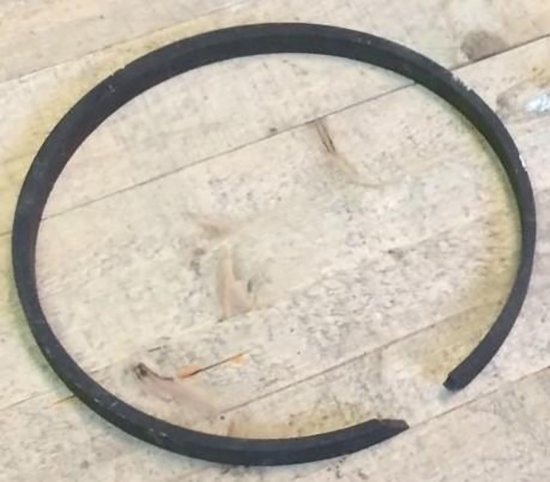
Worn piston ring grooves can cause excessive sideways movement, and make a terrible sound when the engine’s running, as this extreme example shows.
Engineering art
Piston rings are an engineering art form in their own right, and there are countless books discussing their function and manufacture. The main factors in their design are as follows.
Diameter: Obviously this is the most important dimension. If this isn’t correct, the ring won’t seal around its periphery – because it won’t be touching the bore – or it won’t go in. With combustion pressures beyond 300psi when running, even the smallest gap will be detrimental
Radial thickness: This is how thick the cross section is, and it determines the depth of the groove in the piston. It needs to be sufficiently thick to provide the spring that pushes the ring against the bore. However, if it’s too thick, the ring will be too rigid, and you won’t be able to spread it sufficiently to allow it to be fitted on to the piston, or compress them enough to get them in to the bore.
The lateral clearance needs to be kept to a minimum, usually just a couple of thousandths of an inch.
Width: The width of a piston ring needs to be sufficient to maintain a good contact with the bore. If it’s too wide, the contact pressure will be reduced, which can lead to blow-by. Too thin, and it’ll lead to excessive wear.
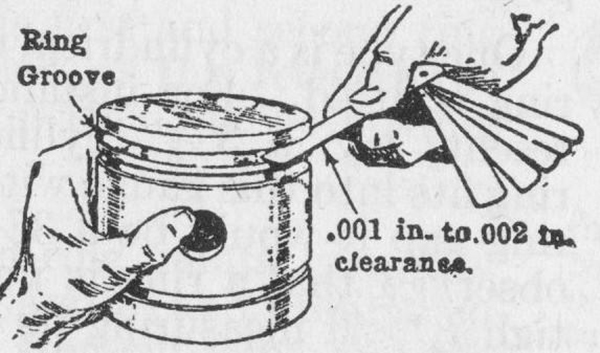
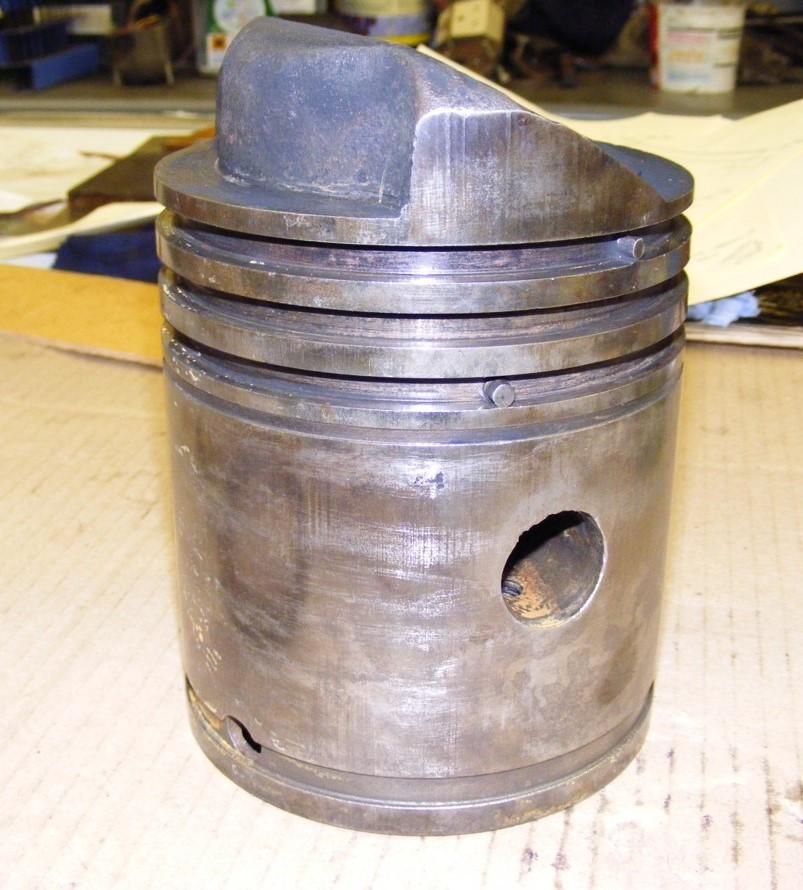
Checking the ring grooves.
Joint style: This is probably the least important feature, and relates to how the ends of a ring are finished. The different options include plain butt, angled scarf or stepped joints, among others. Often, the choice is down to the whim of the designer, but there’s a logic to the idea that angled or stepped joints provide a better seal.
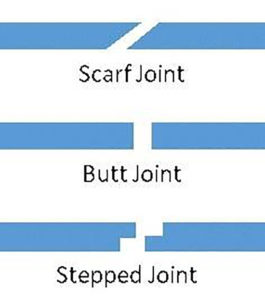
Scarf, Butt and Step joints are probably the most common style you will come across.
Mind the gap
Gap: This is probably second only to the diameter, in terms of importance. If the gap between the ends of the ring is too large, that’ll obviously create a leak path. But if it’s too small, there’s the risk of the ends touching, and the ring galling in the bore.
I’m not going to go into fixing bores in this article; really, that’s a simple subject. If it’s worn, then you’ll need to get a liner fitted, or have it opened-up to make it round and true, which is specialist work. Be careful about just opening-up the bore, though, as you’ll need an oversize piston to run in it afterwards, which may mean having a new one specially made. That can get really expensive. But, when you’ve got a good bore, fitting the new rings (please don’t ever re-use old rings), isn’t a simple case of slipping them on to a piston.
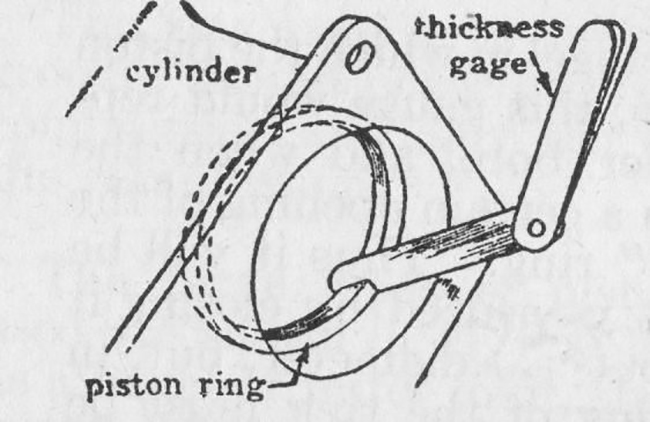
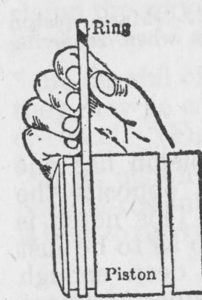
Checking the gap can only be done by fitting the rings into the bore.
The first thing to do is check that the piston is sound, and that its ring grooves are clean and true. Often you can find that the sides are no longer square, as the small sideways movements resulting from a lifetime of running, will have likely worn them. The cure for this is to get them machined, and this will have the knock-on effect of making the grooves a fraction of an inch wider.
Only when you’re happy with the condition of the grooves, will you know how wide your rings need to be. If they’re too narrow, you’ll hear them slapping back and forth while the engine is running, and then you’ll realise you need to spend more money on another new set.
In the groove?
When you have your new set of rings, check that they fit the grooves by offering them up first. If they don’t slide nicely into the groove, don’t force them. There might just be a bit of a burr or dirt stopping them. A careful rub around the side and edges with some fine Emery cloth should do the trick. You’ll also need to check that the radial thickness is less than the groove depth. If they aren’t, you won’t get the piston into the bore.
Whether it’s a new bore or old, it’s always important to give it a good once-over with a honing tool. At the very least, it should be rubbed over with some fine Emery cloth. This is often known as ‘Glaze busting’.
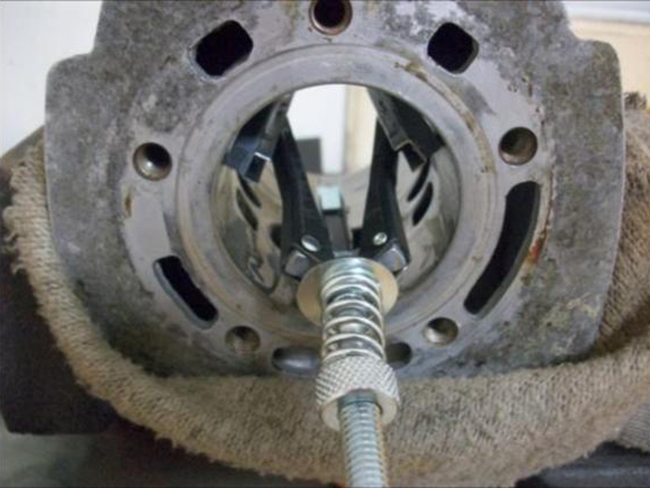
The next thing do is to ‘gap’ them. This involves carefully fitting the individual rings into the bore. You should find that they won’t fit properly as the ends will be touching. The idea is to carefully dress the end of the rings until they fit properly with the smallest of gaps between the two ends.
Feeler gauges are vital for this, as you need to achieve a gap of about – rule of thumb – four thousandths of an inch (0.004in or 0.1mm). Even in the biggest engines, the gap should not exceed about seven-thou. Any more than this and you risk blow-by. Fine, hand files are the best tool for this work, but don’t rush the job; there won’t be much metal to play with, and just one or two passes might be all it takes.
It’s very important to make sure the ends remain straight and true to each other. It also doesn’t hurt to run the thinnest feeler around the ring to check it won’t pass between ring and bore at any point. If it does, the rings you have are the wrong size, and won’t work.
Fitting the rings
The act of actually fitting the rings onto the piston can be terrifying. They are only cast iron, a material not well-renowned for being flexible, but it is surprising how far they will spring if you’re careful. Some people like to use very thin strips of metal to get them on, others just seem to have a knack for it. My advice is that if you don’t feel comfortable doing it, ask a friend to help. There’s no shame in that.
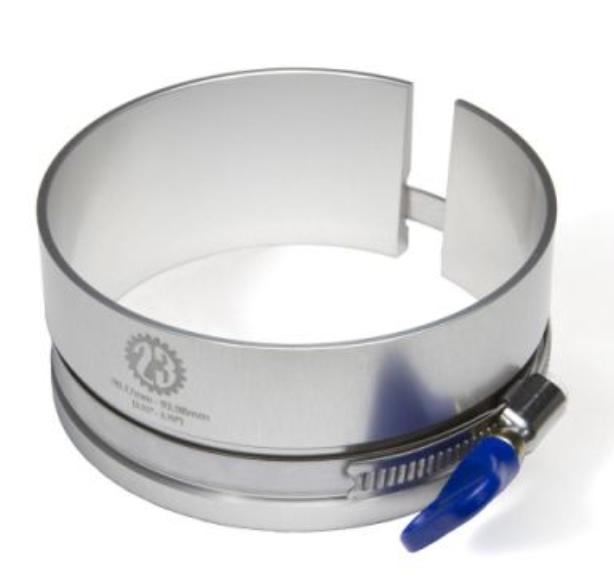
A ring compressor is a useful tool that will usually cover a fairly wide range of diameters.
Getting the piston into the bore can be tricky too. The rings will naturally spring out to a diameter greater than the bore, so they need to be compressed to get them in. Tools can be bought for this that emulate the decades-old idea of a split baked bean tin with a jubilee clip round it. The idea is to clamp it over the piston, then position it up against the bore and slide the piston in. Small levers or screwdrivers can be used to feed the rings in individually, but be careful doing this as it’s easy to chip or snap them, and the edges of the new ones are usually quite sharp and slice easily through fingertips!
In older engines, it isn’t uncommon to find the rings are thicker opposite the gap. This was believed to improve their strength and function.
One area that has been well-discussed in books and journals is that of gap-spacing. This is where the gaps in the rings are, in relation to each other when you fit the piston. Logic dictates that you don’t want them all in line as it creates a leak path. However, there’s little fact to back this up. If you research the subject, you’ll likely find arguments for arranging the gaps equally around the bore, and those stating they should all be closely aligned, with other theories somewhere in between.
Some theories state that, in horizontal engines, the gaps will align at the top as the rings are heavier opposite the gap, so this weight will eventually migrate to the bottom. Some say that the rings will rotate around the piston while it’s running, while others believe they don’t.
Location pegs
Some engine manufacturers fitted pegs into the piston ring grooves that the rings locate on to, to prevent them rotating. Sometimes these are equally spaced around the piston, other times they are quite close to each other.
Sometimes you’ll find pegs in the ring grooves, which are used to prevent the rings rotating.
Personally, I don’t think it matters a jot how the gaps are aligned, as long as they’re correctly gapped. But I confess that I do tend to arrange them equally around the piston, as that just seems good engineering practice. I’ve found them in all sorts of alignments when I’ve pulled pistons, but I’ve never found a problem with blow-by, or a lack of compression that’s been down to poor gap alignment.
A point that many people seem to overlook is that fitting new rings into an engine won’t always have an instant, enormous impact. If you think about it, the rings will have been made to a certain size with a small tolerance. The bore will be the same, so the chance of them being an absolutely perfect, instant match is very low.
This is why a degree of running-in is needed to get them to bed-in nicely. I know my heart has sunk a few times when I’ve fitted new rings, and found that the compression is still poor. But, it doesn’t take very long for things to improve though. Some people do this by spinning the engine with an electric motor, or using another engine. Others simply let it run for a few hours, with lots of oil. There’s no right or wrong approach really, though I’m sure there are opinions.
So, there you have it. Not really a masterclass in the subject. I don’t claim to have more knowledge than everyone else, and some of my practices might not be considered ‘textbook’ but, hopefully, it’s been helpful and an insight for some into the world of piston rings and fitting them.
To subscribe to Stationary Engine, click here